THINK YOU CAN’T START A FOOD BLOG? THINK AGAIN!
When I started thinking about starting a food blog, I have to admit, it was a little intimidating at first. I really wanted to share my recipes and food passion with the world, though, so I dove right in! I was surprised to find out how easy it really is to start a food blog.
To make things easier for you, I’ve put together this step-by-step tutorial.
1. Pick a website domain name
Think of a domain name as a brand name for your website, like a product. You want to think of something catchy and easy to remember so the user can come back to your blog and not forget about it. Then, you can book your domain name through a domain registrar.
There are literally hundreds of domain registrars on the web that are offering you domain registration and more. You want to ensure that you select a domain provider that has a long standing quality reputation – not one that is relatively new. Sadly, there are a lot of domain resellers that don’t stay in business long, which can cause future issues. Choose from a very reputable domain registrar and you should be fine.
I’m recommending Bluehost, just click on the new domain option, type in the name and check for availability. That’s it!
Don’t be discouraged if the first name you try is not available! You can try a variation of the domain name, or even try changing the extension from a .com to .ca, .net or even .co
Go ahead and give it a try… fill in your domain below and check availability… That’s it! You’ll see an account set up screen next, where you’ll select your package, and you’ll be ready to go!

2. Select Your Website Hosting Company
You may be wondering what a hosting company does. Basically, they rent space on their server to store your website and provide Internet connectivity so that other computers can access your website on the Internet.
Blue host has been the #1 recommended web hosting service by WordPress.org since 2005!
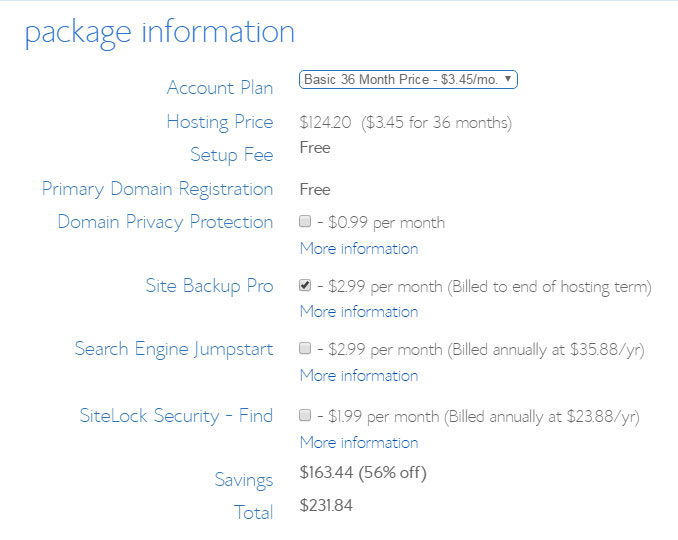
For your food blog, Bluehost is an excellent choice because of the ease of use and their reliability. They offer a variety of hosting packages at really reasonable prices. The longer period you choose to host your site, the lower the monthly price. I strongly recommend the 36-month option, which costs about $3.45 per month. As a bonus, Bluehost currently offers a free domain name when you purchase a new hosting account with them so you can kill two birds with one stone!
There are up-sell options, however the only one I recommend right away is the Site Backup Pro – you want to ensure that you have a back up of the site in case anything happens.
And if you really want to start driving traffic to your site right away, go ahead and click to add their Search Engine Jumpstart which is only $3 per month! So good!
3. Install WordPress
Wordpress is the biggest and easiest blogging platform to use. It powers about 90% of the blogs out there. Having said that, there are actually 2 WordPress websites: WordPress.com and WordPress.org.
WordPress.com is ‘free’ in that you don’t require another hosting company (like the Bluehost packages I mention above). For those people just testing the waters and not really ready to commit to blogging, wordpress.com offers a good starter solution. The biggest CON to going this route is that it won’t give you any real brand identity because your domain name will be something like www.YourBlog.Wordpress.com and you get limited choices of themes and plugins. Worst of all… if you start gaining a lot of followers to your pseudo-domain, if you later decide to switch to something more personal, your followers will have a hard time finding you again!
WordPress.org will allow you to use a proper domain name – something unique to you – and you’ll have full control of your blog website and access to thousands of themes and plugins. If you want to be a serious Food Blogger, start with WordPress.org. You do pay a fee for the hosting, but when you look at how cheap the Bluehost packages are above, it is totally worth it.
PLUS (!), for Wordpress users, Bluehost offers a free domain with 1-Click WordPress Installation and site builders plus 24 hour support. It just can’t get any easier than that!
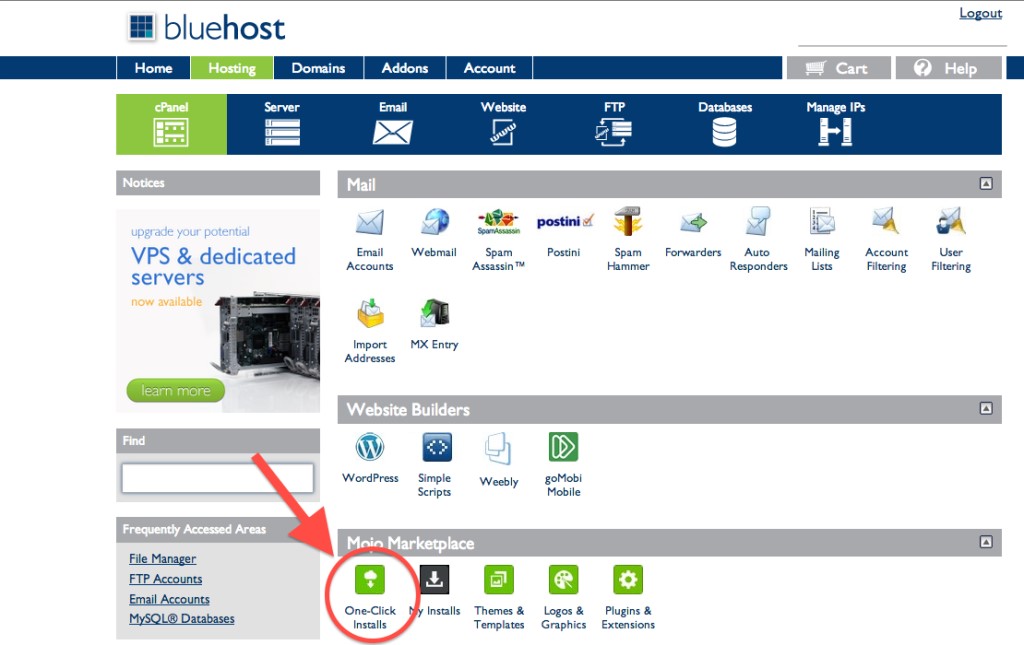
In Bluehost, go to your user panel and find an icon labeled “One-Click Installs”. Click on WordPress and follow the on-screen prompts. EASY!
4. Buy and Install a Theme OR have someone do it for you
Once you have WordPress installed on your domain, you have the ability to change the theme – or the look and feel of your website whenever you like.
What theme you choose to go with is very important. It must be extremely user-friendly, mobile responsive (meaning, it looks good on all devices), the recipe search must be easy to find and use, and the recipe layout has to be something that looks clean, organized and easy for the user to follow along with. Remember – if your site seems overwhelming, people are less likely to keep coming back!
I have had my recipe blog for a few years now, and have had a couple of different themes over the years. But the theme you see now is my favourite! I worked with Envato Studio’s Theme Forest for my WordPress Theme installation. Envato is like a job board for WordPress Developers and installers, so you can view different freelance developers, the services they offer and the rates they charge. All of the developers are reviewed and approved experts and their fees are very reasonable. (They can also customize the look of your theme as well.)
You could use a free theme, but paying for a professional theme has its benefits; you get support, updates, and generally higher source code quality, which generally means better SEO and site performance with fewer potential problems.
Here is the theme that I use for this website… It is fully mobile responsive, and comes with a lot of options for displaying all of my recipes and photos! I love it!
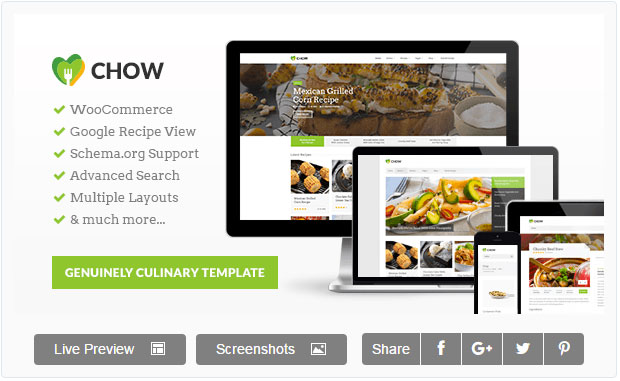
Or you can browse a variety of other food-focused themes and have the Envato team do the initial install and set up for you! Done and done!
And remember – this part of the process is a one-time investment. Once you get your site looking exactly the way you like, you can spend all your days posting your favourite foods!
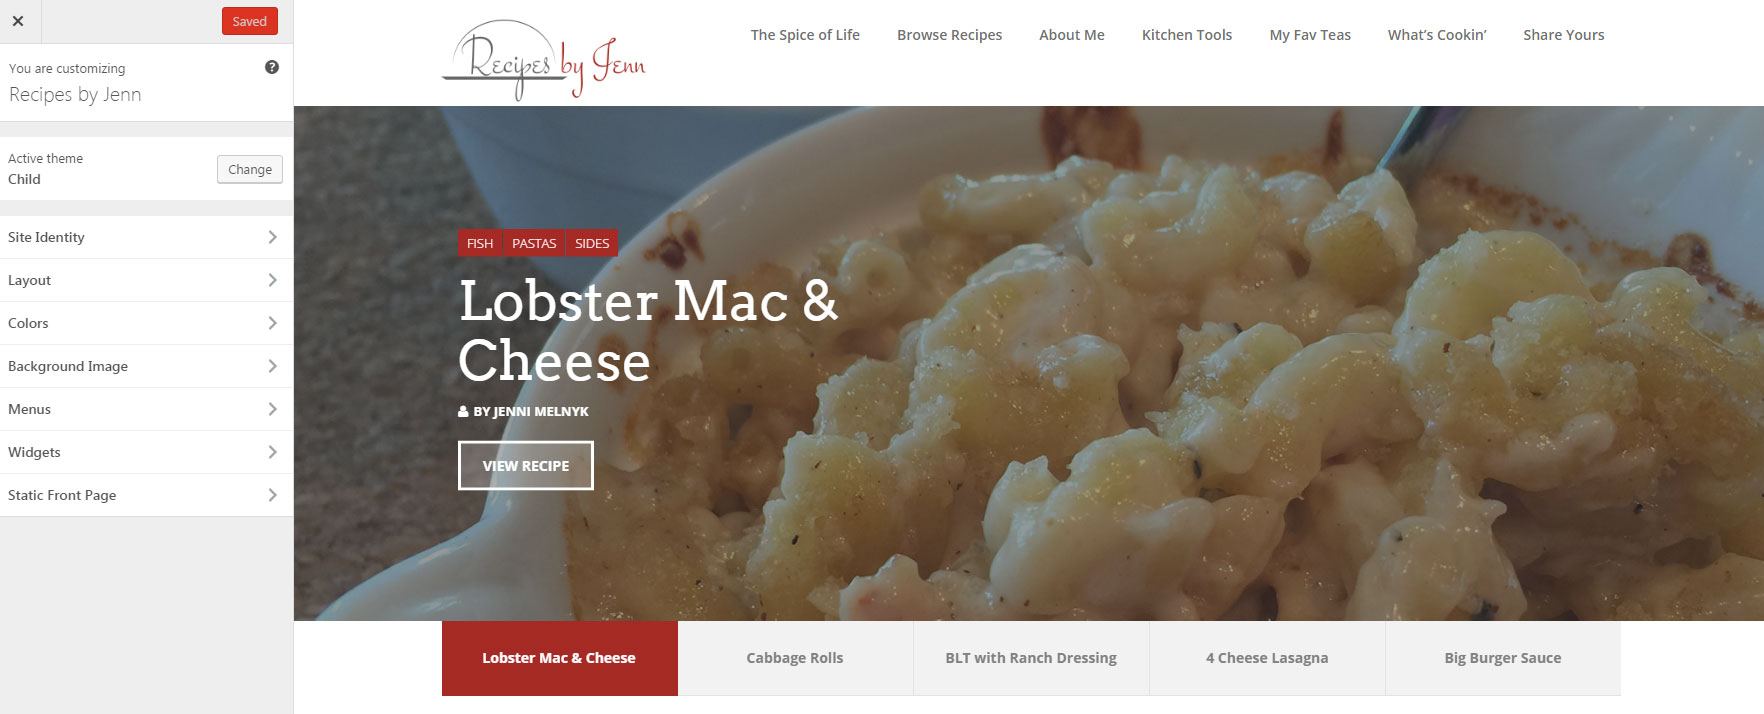
5. Customize Your Theme
Every modern WordPress theme allows you to customize various details of the appearance like colors, background images etc. This will make your site more interesting to the readers. You can also customize features like the menu and add widgets like a calendar of your site’s posts, categories of you posts etc. This ability is available through the built-in WordPress Customizer.
Once your site is set up, you can return to the Customizer by going to wp-admin / Appearance / Customize.
If you choose the Chow theme that I’m using, this is what you’ll see under the Customizer:
6. Write some great content
This is where the fun begins! After all, you are launching a food blog because you want to publish some tasty recipes, provide some food prep tips and highlight some great kitchen and cooking tools.
To get started, go back to your WordPress admin panel (http://your_domain.com/wp-admin/) and then to “Posts » Add New” from the left sidebar.
I would love to see your new blog!
Send me a comment and either a link to your blog or the name of your blog so I can find you online.
Disclaimer: Some of the links above are affiliate links, and I earn a commission if you sign up for the service after clicking on the link. I include these because I use these companies and have been highly satisfied with their services. Even if I did not earn a commission, I would still highly recommend them.
